[First: Ripping off the old rotten fascia and soffit boards to expose the decayed roof structure.]


(Here soffit boards underneath are ripped off on section to be worked on here.)


When opening the bottom of the soffit, I discovered a thankfully old and not active bees nest. This is where the top soffit met the lower one on the house.
[Bees Nest]

[Next: is cutting the roof section down to the house, leaving a small stub as a guide for future brace placement. Note below is the view of the upper soffit joining the lower]

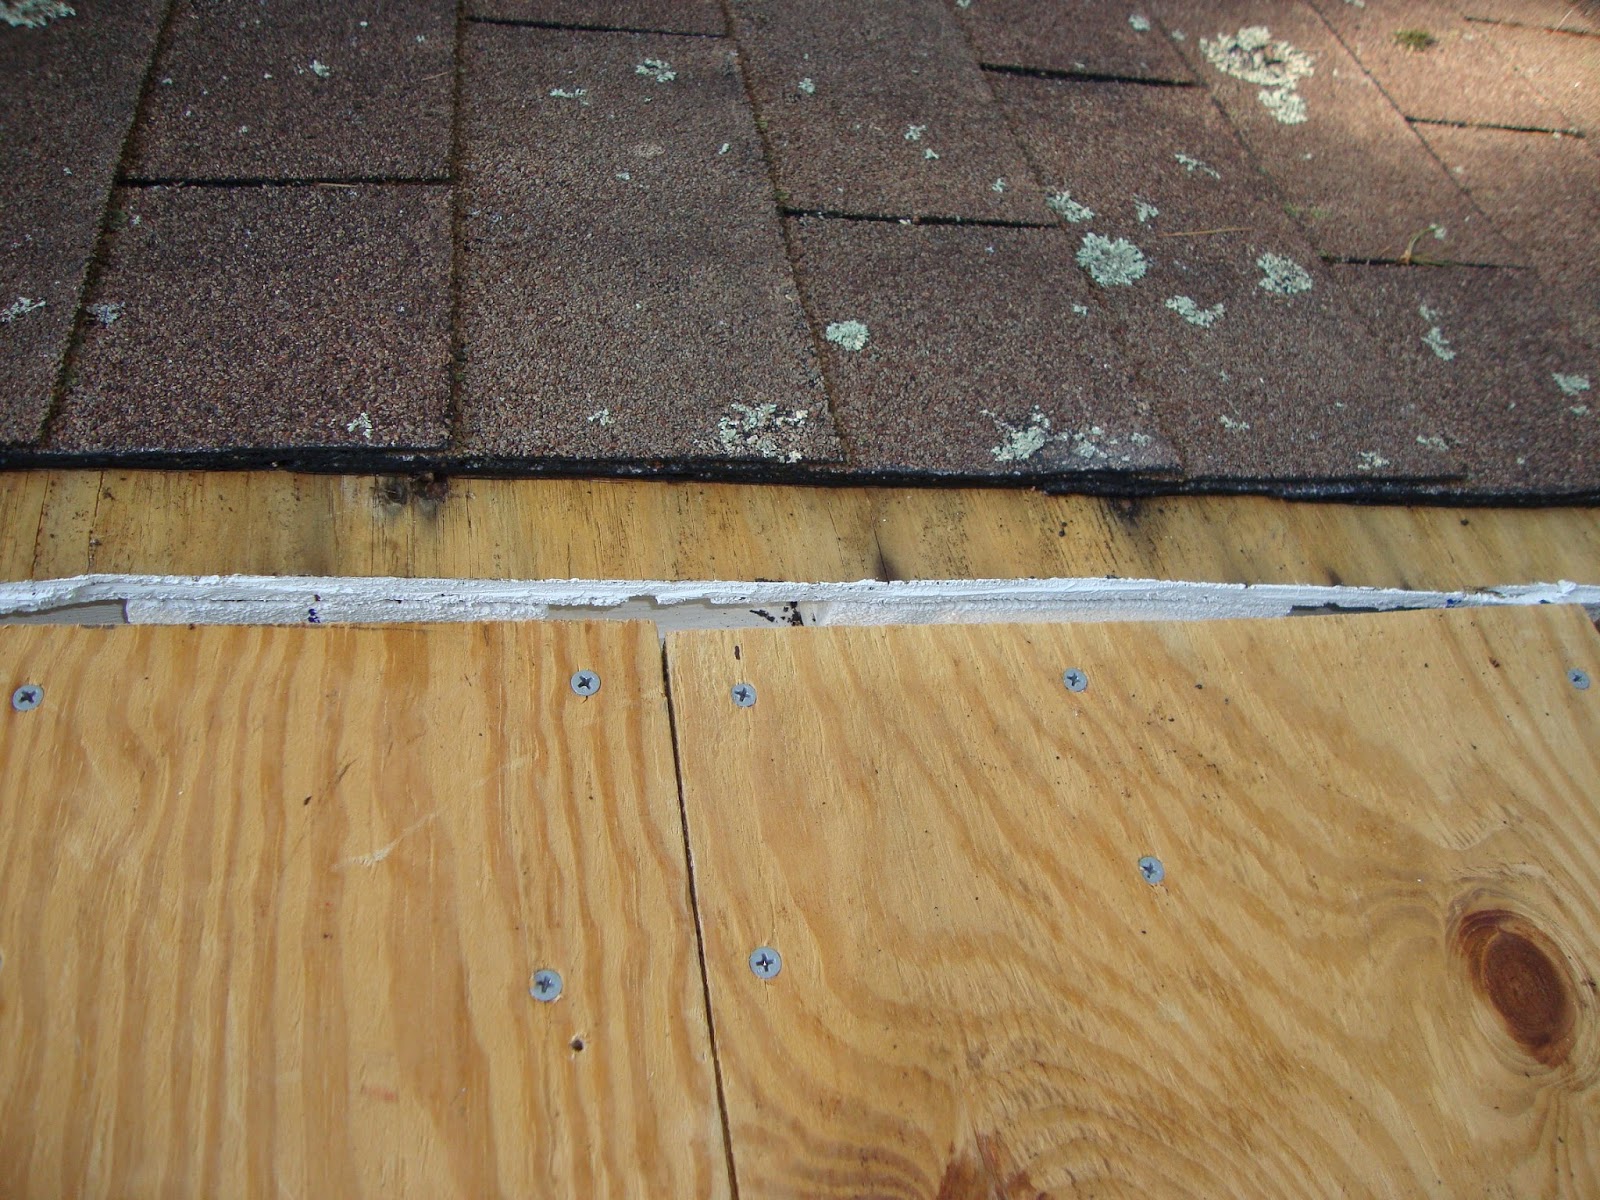
The method I used to cut off the roof was to use a twin blade cutting saw (2 small circular saw rotate opposite directions) to follow a straight line either using chalk or string line. This does not cut deep enough but gives a track to follow about an inch deep right through the shingles - this saw is very safe as it does not kick or jump around, then use the reciprocating saw and you will get a straight cut


[Showing the cut off roof and the new soffit set to join the section]

[Next: Cover up any area you are not working on right away, here I used flashing on the lower soffit junction where some real carpentry will be needed]


[Next: In my case adding a 2x4 backboard for a solid screw base as the old house boards have lots of large spaces and edges to split, also this brings the depth closer to the outer wall]


[Next: Adding supports. I used 2x4 with brackets to attach them, they are very strong, but we will add even more support later. Note I have painted and caulked any cracks to make the entire work area rain and bug proof - goes quick and save lots of trouble. Note the finished section.]


(Also showing the flashing protecting future work area where soffits join. This area will be fixed in another blog.)


[Next: Top bring thickness up to roof (old boards are different remember) I add spacer planks which also give a little more strength]

[Next: At the roof angle I used a steel brace to tie the 2 supports together to make them strong. I also cut off any wood sticking up with a reciprocating saw - seconds to do and easier than pre-calculating and pre-cutting. Steel is from a large angle brace, I cut off the corner bend]

[Next: I attached joist straps to add another level of support, while not intended for this, they work well when doubled up - one of top of another as they are thin. You could use large angle braces or other supports]


[Next: Start putting plywood on top to match edge, the roof line is not as important, so a small slit is okay there but line to outside edge is important for later fascia board]


(I again trim the corner turn, note marking where the 2x4s are, you will need that)

[Next: Attach fascia boards. I measure the distance to spots where I could put screws. That way you never miss and it goes quick.


(I built a special holder for the fascia boards, that way it has something to sit in on the other end of 8 feet, adding a screw on the 2x4 support prevents it from sliding past where you need it - works well for one person install)


[Next: I put tar paper on as temporary rain protection until I can do the next steps]

(How it looks at this stage for this section of roof)

[Next: I cut a shingle line past the roof cut on a regular tab line so it is easy to match. I used a multi-tool with a circular cutter, but diamond attachment would be better as stones wear down metal]

[Next: I put flashing down, you can use tar paper but i like vinyl flashing, easy to use and shingles slide over it nice which is good for hard to reach spots.]


[Note: Overhang just like shingles but just short of the shingles.]

[Note: Generous overhand at end of work if you are to continue at a later time, in my case I need to do the woodwork later where the roof meets the lower overhang (covered in metal flashing).]

[Next: Install shingles. To line them up I use a marker and draw a line from the shingles adjacent and use that.]

[Next: because the junction has white flashing under it I put brown flashing pieces (5x5 inches or so) to hide that, I glue that with caulk later.]


[Next: Install soffit boards. I am leaving a gap for ventilation, which I later screen off.]


[Note: Another helper item, simple 2 pieces screwed in give me an end holder (on one end) for the board, again with a screw for a stop, just slide in, position and attach.]

[Next: In my case - I put silicone caulk on the shingle joint just to make sure no water gets in, even though you may not need it. I could use brown paint and hide it more, but it will be a complete re-shingle not too far in future. If you removed more of the old shingles you could hide it completely with no trace with full shingles, but again it will be replaced in this situation.]


[Next: Start adding the screening to keep creatures out, I used double screening made up 2 types of gutter screens, vinyl and metal, overkill I know but i will not worry.]

[Next: In my case I want to give extra support to the overhand so I add pipes. To make the flanges fit at the angle I cut the sides of the circle off, this is 1/2 inch pipe.]

[Next: Pipe installed and screen installed. Pipe is optional for extra safety since I cut the main roof supports. All screw holes are caulked. Boards joining the house are caulked, Any too-obvious gaps in boards are also caulked to hide large joint seams (in an old house you will get boards not lining up due to the house not being straight in all directions).]

[Me - in renovation mode (there was a lot of sun on me that day).]

[Finish - See other blog for end detail connect soffit to soffit. Remember lower and other sides are not finished yet, just this upper. ]


So wonderful to see that side all done!
ReplyDeleteGet a quote from the top subcontractors in Vancouver, Our crews do work for all the roofing contractors. Now get the same crews they hire to do your home for less money while getting the same service that you get from the big guys. We will get you several roofing quotes from roofing contractors that have all the insurance and skills so you have piece of mind. Join in with the roofing contractors that buy in bulk to pass of savings to you. If you want more info click here link : Roof repair
ReplyDeleteCould it be fine to reference some of this particular on my weblog only add a back link to this particular page? sacramento roofing company
ReplyDeleteThanks for sharing informative post. Looking for best Office Cleaning Brisbane, we are the professional cleaning company offering professional cleaning services.
ReplyDeleteHouse Renovations in Bermondsey
hi
ReplyDeleteI stumbled upon your blog post and was glad to find valuable insights on roof overhang and soffit repair. It's always crucial to address these issues promptly to prevent further damage. For those in Vancouver dealing with similar concerns, seeking professional expertise in Fascia Repair Vancouver can make a significant difference. Keep up the great work in sharing such helpful information!
ReplyDelete